
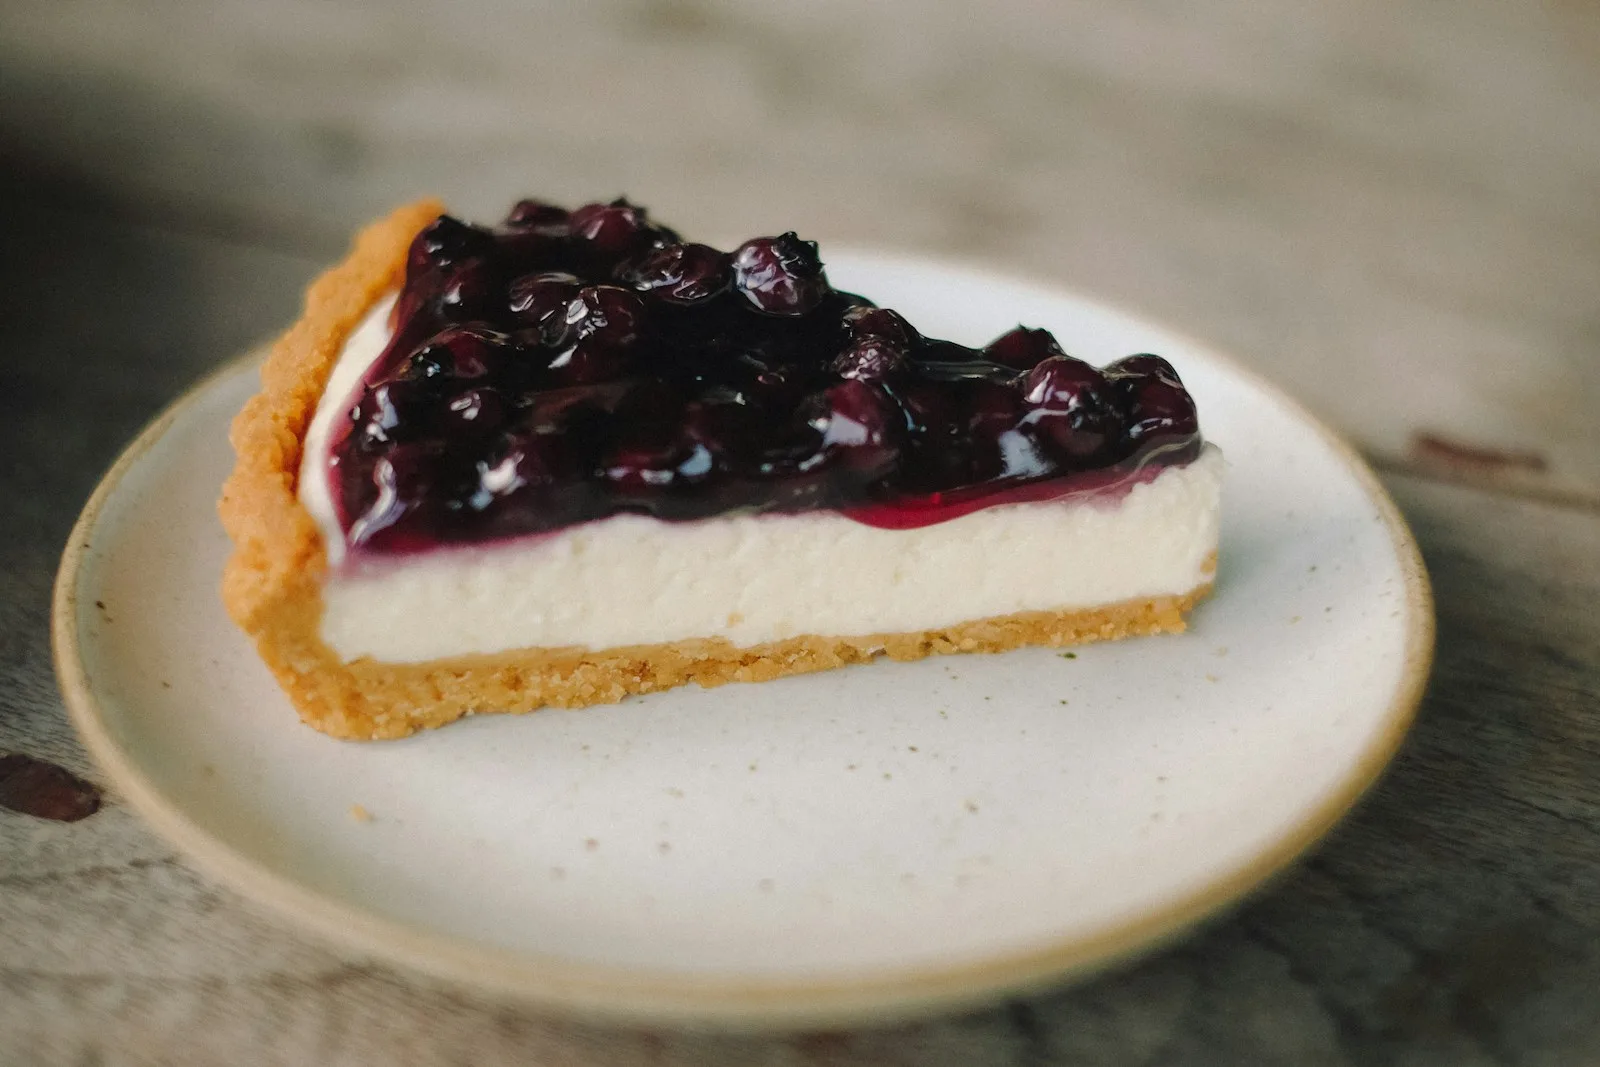
A truly magnificent New York cheesecake is the pinnacle of dessert royalty: towering, ultra-dense yet velvety-smooth, decadently rich, and supported by a thick, buttery graham cracker crust. If you've ever been terrified of sunken centers, rubbery textures, or unsightly canyon-like cracks across the top, this foolproof cheesecake recipe breaks down the culinary science to guarantee an effortless, showstopping centerpiece every single time.
The 4 Golden Rules for a Crack-Free Cheesecake
Cheesecake is technically a delicate baked custard, not a traditional flour cake. Preventing cracks and maintaining that signature silken texture comes down to four essential rules:
- 100% Room Temperature Ingredients: Cream cheese, sour cream, and eggs MUST be thoroughly at room temperature (leave out for 2 hours before baking). Cold cream cheese creates lumps that cannot be smoothed out without overbeating.
- Mix on Low Speed (Avoid Beating Air): Incorporating excess air into cheesecake batter is the #1 cause of cracks. As trapped air expands in the oven, the cheesecake puffs up like a soufflé, then collapses and splits as it cools. Always mix on low speed and never whip.
- The Water Bath (Bain-Marie): Baking in a hot water bath insulates the delicate cream cheese custard, preventing the outer edges from cooking faster than the creamy center and creating gentle, uniform humidity.
- The Slow Oven Cool-Down: Never remove a hot cheesecake directly into cool room-temperature air. Sudden temperature shifts cause the custard to contract and crack. Turn the oven off, crack the door open with a wooden spoon, and let the cheesecake rest inside for a full hour.
Ingredients for Supreme Cheesecake
- Graham Cracker Crumbs: 2 cups (200g) finely crushed graham crackers.
- Melted Butter: 6 tablespoons (85g) unsalted butter.
- Sugar for Crust: 2 tablespoons granulated sugar + pinch of salt.
- Full-Fat Philadelphia Cream Cheese: 32 oz (four 8-oz brick packages / 900g), room temperature. (Never use tub cream cheese or low-fat varieties).
- Granulated Sugar: 1 cup (200g).
- Sour Cream: 1 cup (240g) full-fat, room temperature. Adds iconic New York tanginess and silken texture.
- Pure Vanilla Extract: 2 teaspoons.
- Fresh Lemon Juice: 1 tablespoon for bright balance.
- Large Eggs: 4 eggs, room temperature, lightly beaten.
Step-by-Step Culinary Method
1. The Buttery Crust: Preheat oven to 350°F (175°C). In a bowl, mix graham cracker crumbs, sugar, and melted butter until it resembles wet sand. Press firmly into the bottom and 1 inch up the sides of a 9-inch springform pan. Bake for 10 minutes, then cool completely on a rack.
2. Water Bath Prep: Wrap the bottom and sides of the springform pan tightly in 3 layers of heavy-duty aluminum foil (or place the pan inside a 10-inch silicone baking cake pan) to prevent water leakage.
3. The Cream Cheese Filling: In a stand mixer fitted with the paddle attachment (or using an electric hand mixer on LOW speed), beat the room-temperature cream cheese and sugar for 2 minutes until completely smooth and lump-free. Add the sour cream, vanilla extract, and lemon juice; mix on low until incorporated.
4. Add Eggs One at a Time: With mixer on the lowest speed, add the eggs one by one, mixing just until each egg is barely incorporated. Do not overmix! Pour the silky batter over the cooled crust.
5. Bake in Water Bath: Place the foil-wrapped pan inside a large roasting pan. Pour boiling water into the roasting pan until it reaches halfway up the sides of the springform pan. Carefully transfer to the oven and reduce oven temperature to 325°F (160°C). Bake for 65 to 75 minutes.
6. The Jiggle Test & Slow Cooling: The cheesecake is done when the edges look set and puffed, but the center 2 inches still has a gentle Jell-O-like jiggle when gently tapped. Turn off the oven, prop the door open about 1 inch with a wooden spoon, and let the cheesecake cool inside for 1 hour.
7. Chill Overnight: Remove from the water bath, discard foil, and run a thin paring knife around the rim of the pan to release any edges. Cool to room temperature on the counter, then cover loosely and refrigerate for at least 6 hours (preferably overnight). Slice with a warm knife for razor-sharp bakery cuts!
Showstopping Desserts for Entertaining
Hosting family or friends? Pair this creamy cheesecake with our warm British Sticky Toffee Pudding, whip up tender frosted Vanilla Cupcakes, or bake a batch of Fudgy Brownies.
The Culinary Secrets Behind Foolproof Classic New York Cheesecake Recipe (Ultra-Creamy & Crack-Free)
Few homemade creations bring as much joy and comforting satisfaction to the table as a properly executed Foolproof Classic New York Cheesecake Recipe (Ultra-Creamy & Crack-Free). Whether you are cooking for a relaxed family dinner, preparing nutritious weekly meal prep, or entertaining friends with vibrant American dining, this recipe has been meticulously tested and calibrated to deliver restaurant-quality results with accessible pantry ingredients.
Too often, homemade versions of Dessert favorites suffer from either becoming dry, lacking depth of seasoning, or requiring cumbersome specialty tools. By understanding the core culinary science behind precise temperature oven baking, you can consistently achieve the golden textural contrast, tender interior, and balanced flavors that define professional cooking.
Chef Emily's 4 Professional Kitchen Secrets
- Quality Foundation with 2 cups (200g) graham cracker crumbs: The foundational flavor of this dish relies on using fresh, high-grade ingredients. Taking the time to properly prep and measure your components ensures balanced moisture and seamless caramelization during cooking.
- Precision Temperature Management: Avoid the temptation to rush the cooking process. Cooking at the calibrated temperature allows proteins to tenderize and starches to gelatinize evenly without scorching or weeping moisture.
- Layering Seasonings at Every Stage: Rather than seasoning only at the very end, introducing aromatics, herbs, and fine sea salt in stages builds compound flavor layers that permeate deep into every bite.
- Mandatory Resting Period: Whether dealing with baked proteins, warm casseroles, or fresh bakes, allowing the dish to rest for 5 to 10 minutes off the heat is critical. Resting stabilizes internal steam and redistributes flavorful juices evenly throughout the dish.
Smart Ingredient Substitutions & Customizations
- Dietary & Gluten-Free Options: Depending on your household needs, standard flour or breadcrumbs can be substituted 1:1 with certified gluten-free blends or blanched almond flour without compromising the final texture.
- Dairy Adjustments: For a lighter or dairy-free profile, swap heavy dairy components for unsweetened cashew cream, full-fat canned coconut milk, or high-quality plant-based butter.
- Aromatic & Herb Variations: Feel free to customize the herbal profile with fresh thyme, rosemary, chopped cilantro, or sweet Italian basil to complement whatever seasonal sides you are serving.
Make-Ahead, Reheating & Safe Storage Guidelines
This dish stores remarkably well, making it an outstanding candidate for make-ahead planning. Allow leftovers to cool completely to room temperature before transferring to an airtight glass container.
- Refrigeration: Store chilled in the refrigerator for up to 4 days. Reheat gently in an oven or over medium-low stovetop heat with a splash of broth or water to preserve moisture.
- Freezing Instructions: Wrap securely in freezer-safe parchment and heavy-duty foil, or portion into freezer bags. Freeze flat for up to 3 months. Thaw overnight in the refrigerator before gently reheating.
Comments & Reader Questions (0)
Tried this recipe or have a question? Post a comment below using your Google account. Whenever someone replies to your comment, you will receive an instant notification in your inbox!